

React Query 설치
먼저 프로젝트에 React Query를 설치한다. React-Query 홈페이지로 들어가면 아래와 같이 설치 명령어가 있다. 알맞은 명령어를 선택해 설치한다.
$ npm i @tanstack/react-query
# or
$ pnpm add @tanstack/react-query
# or
$ yarn add @tanstack/react-query
# or
$ bun add @tanstack/react-query
설치가 완료되었다면 프로젝트에 셋팅을 해보자.
React Query 셋팅
- React
import React from "react";
import ReactDOM from "react-dom/client";
import {QueryClient, QueryClientProvider}from "react-query";
import App from "./App";


const root = ReactDOM.createRoot(
  document.getElementById("root") as HTMLElement
);
const queryClient = new QueryClient(); // 생성

root.render(
  <React.StrictMode>
    <QueryClientProvider client={queryClient}>
        <App />
    </QueryClientProvider>
  </React.StrictMode>
);
프로젝트 최 상단인 index 페이지에서 QueryClientProvider로 감싸준 후 queryClient를 만들어 넣어준다.
- next.js
next.js에 최상단은 layout이다. 하지만 필자의 경우 layout은 SSR로 유지하고 싶어 component를 만들어 작성 했다.
> ReactQueryProvider.tsx
'use client';

import { QueryClientProvider, QueryClient } from '@tanstack/react-query';
import { ReactQueryDevtools } from '@tanstack/react-query-devtools';

export default function ReactQueryProviders({
  children,
}: React.PropsWithChildren) {
  const queryClient = new QueryClient();

  return (
    <QueryClientProvider client={queryClient}>
      {children}
      <ReactQueryDevtools initialIsOpen={false} />
    </QueryClientProvider>
  );
}
> layout.tsx
import MainSide from '@/components/MainSide/MainSide';
import './globals.scss';
import { Inter } from 'next/font/google';
import AuthContext from '@/components/Auth/AuthContext';
import ReactQueryProviders from '@/util/ReactQueryProvider';

const inter = Inter({ subsets: ['latin'] });

export const metadata = {
  title: '따름 - 와인을 따르다.',
  description: '따름! 평범한 일상 와인을 따르며 즐겨보세요.',
};

import localFont from 'next/font/local';
import { ReactQueryDevtools } from '@tanstack/react-query-devtools';

const myFont = localFont({
  src: './fonts/PretendardVariable.ttf',
  display: 'swap',
});

export default function RootLayout({ children }) {
  return (
    <html lang="kr" className={myFont.className}>
      <body>
        <ReactQueryProviders>
          <AuthContext>
            {children}
            <MainSide />
          </AuthContext>
        </ReactQueryProviders>
      </body>
    </html>
  );
}
셋팅이 완료되었다면 devtools도 함께 설치 해준다. 공식문서에서 보면 다음 명령어를 입력하라고 한다.
$ npm i @tanstack/react-query-devtools
# or
$ pnpm add @tanstack/react-query-devtools
# or
$ yarn add @tanstack/react-query-devtools
# or
$ bun add @tanstack/react-query-devtools
알맞은 명령어를 입력해 설치 해준 다음 import 해주면된다.
'use client';

import Main from './main/page';
import { QueryClient, QueryClientProvider } from '@tanstack/react-query';
import { ReactQueryDevtools } from "@tanstack/react-query-devtools";
export default function Home() {
  const queryClient = new QueryClient();

  return (
    <QueryClientProvider client={queryClient}>
      <main className="main">
        <Main />
      </main>
      <ReactQueryDevtools initialIsOpen={false} /> devtools
    </QueryClientProvider>
  );
}
다음과 같은 위치에 추가시킨 후 프로젝트를 실행해보면 다음과 같이 devtools가 정상적으로 뜨는 것을 볼 수 있다.
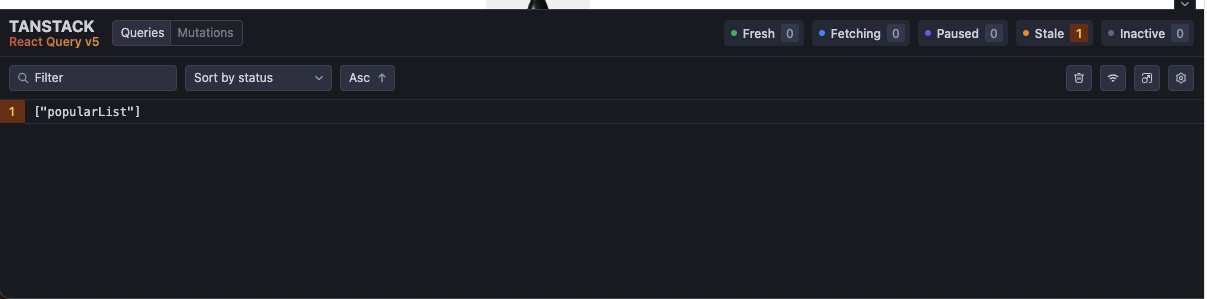
initialIsOpen은 ture이면 devtools가 펼쳐져 있는 상태로 실행되고 false면 devtools가 접혀있는 상태로 실행된다.

React Query 사용
Axios를 사용해 먼저 url을 만들어줬다.
- AxiosConfig.tsx
import axios from 'axios';

const AxiosConfig = axios.create({
  baseURL: 'API 베이스 주소',
  withCredentials: true,
});

export default AxiosConfig;
Axios를 사용해 baseURL을 만들었다. API주소를 보면 공통적인 주소가 있을 것이다. 그 공통적인 주소만 입력하면 된다.
- AxiosGet
import AxiosConfig from './AxiosConfig';

interface LoginFrom {
  name: string;
  nickname: string;
  phoneNumber: string;
  loginId: string;
  password: string;
  email: string;
}

const getPopularList = () =>
  AxiosConfig.get('/items/popular-list').then((res) => res.data);

const showLogin = (
  name: string,
  nickname: string,
  phoneNumber: string,
  loginId: string,
  password: string,
  email: string,
) => {
  const loginFormData: LoginFrom = {
    name: name,
    nickname: nickname,
    phoneNumber: phoneNumber,
    loginId: loginId,
    password: password,
    email: email,
  };

  return AxiosConfig.post('/members/register', loginFormData).then((res) => res);
};

const getCategory = (id) =>
  AxiosConfig.get(`items/popular-in-category`).then((res) => {
    res.data;
  });

export { getPopularList, showLogin, getCategory };
위 코드와 같이 CRUD를 잘 활용하여 작성후 export 해준다.
- main.tsx
import { getPopularList } from '@/util/AxiosGet';
import { useQuery } from '@tanstack/react-query';


export default function Main() {

  const { data, status } = useQuery({
    queryKey: ['popularList'],
    queryFn: getPopularList,
  });

	console.log(data);
  return (
    <div></div>
  );
}
useQuery를 사용해 data와 status를 가져올 수 있다. key는 원하는 이름으로 작명해서 넣으면 되고, queryFn은 아까 만든 axios export된 함수를 import후 넣어준다.
이후 정상적으로 작성이 되는지 console.log를 찍어보면

현재는 데이터가 없어서 안뜨지만 정상적으로 작동되는 것을 볼 수 있다. data, status 말고도 다른 반환 값도 있다.
- status : 비동기 로직의 현재 상태를 반환한다.
- loading : 데이터를 요청 중
- error : 데이터 요청 실패
- success : 데이터 요청 성공
- isLoading : 로딩중인지 여부를 나타낸다.
- isFetching : 리액트 쿼리가 요청 중인지 여부를 나타낸다.
- isSuccess : 요청 성공 여부를 나타낸다.
- inError : 요청 실패로 에러 여부를 나타낸다.
- data : 서버로부터 요청하여 받은 데이터이다.
- error : 요청실패에 대한 에러 내용이다.
- refetch : 수동적으로 서버에게 데이터 요청을 할 수 있다. 이때는 리액트 쿼리가 모든 옵션을 무시하고 무조건 서버에 데이터 요청을 한다.
'👨💻 React' 카테고리의 다른 글
| React - React Query(TypeScript)란? (0) | 2024.04.02 |
|---|---|
| Redux middleware (0) | 2024.02.19 |
| Redux (0) | 2024.02.19 |
| Router (0) | 2024.02.19 |
| Life Cycle (0) | 2024.02.19 |